Making Private Text and Voice Channels
A guide to making exclusive channels in your Discord server.
A private channel isn't visible to anyone not in the group(s) that you allow access to it, meaning it won't even show up in their channel list.
Creating a New Channel (and Making It Private by Default)
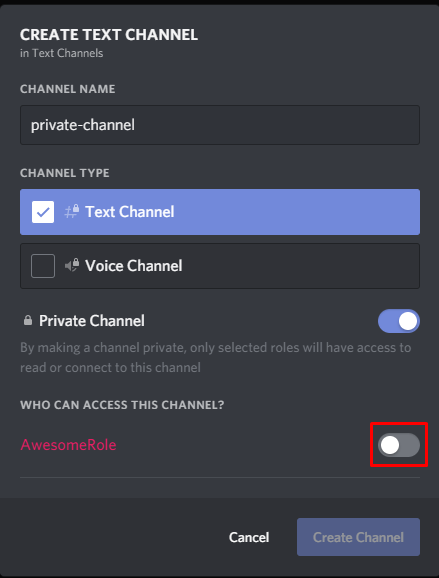
To create a private channel, simply turn on the "Private Channel" option when creating a channel, and select the groups you wish to allow access to the channel. If you need to know how to create roles, check out our adding roles tutorial.
Making an Existing Channel Private
To make a channel that already exists private, it is a little bit more complicated, but still a fairly straight-forward process.
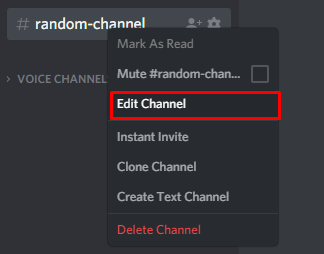
Right click on the channel you wish to make private, and click "Edit Channel":
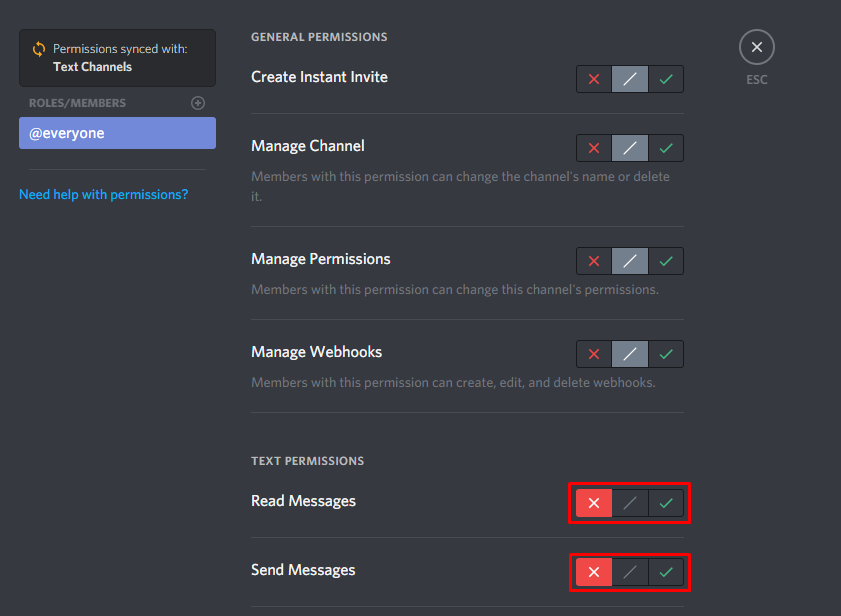
Next, navigate to the "Permissions" tab, and disable both "Read Messages" and "Send Messages" messages for @everyone by toggling the options to the red "X". For voice, you will need to disable "View Channel" instead. Pictured are the steps for text channels:
After doing this, all you have to do is change the permissions for each role you wish to have access to the channel.
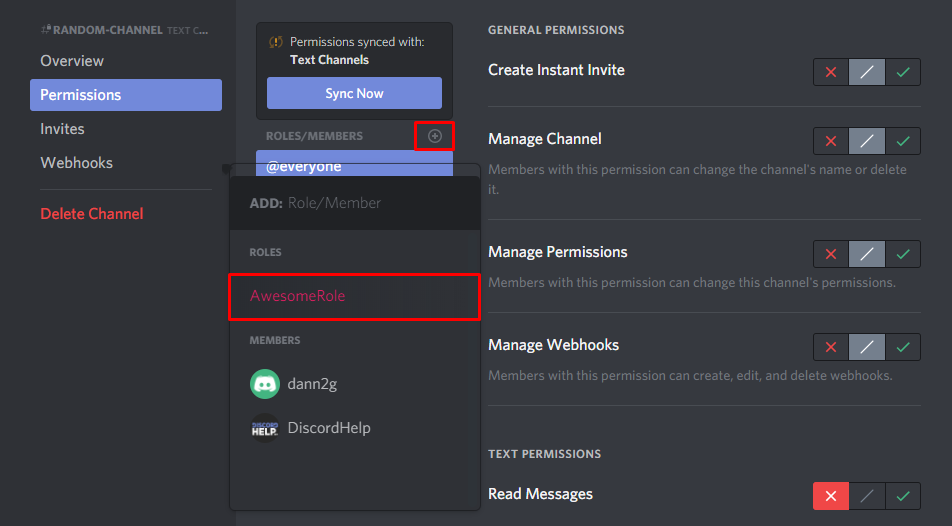
Firstly, in the "Permissions" tab, add the role (or server member) you wish to allow access to the channel. As pictured:
Next, enable the "Read Messages" and "Send Messages" text permissions (or for voice channels the "View Channel" permission), and save.
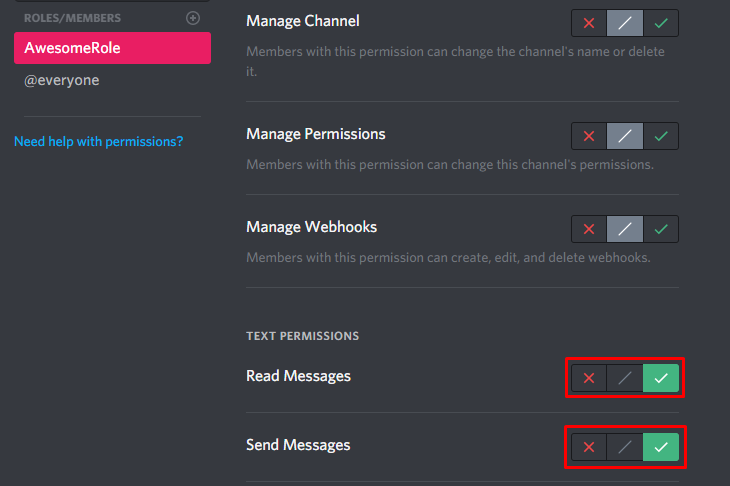
After doing the above, that's it! You now have a private channel accessible only by the role or member you selected. If you would like to allow access to more roles/server members, simply repeat the above steps.
Recommended
Similar articles we think you might like
Ways to Quote Discord Messages
Some not-quite-official but almost-as-good ways to quote what others have said in Discord.
Read MoreHow to Find Out a Discord Role ID
It's easier than you might think.
Read MoreCan You Tell If Someone Is Invisible in Discord?
The answer probably won't surprise you!
Read More